Transform damaged or aging wooden furniture into stunning works of art using wood inlay epoxy techniques that combine traditional craftsmanship with modern materials. This versatile restoration method allows craftspeople to fill voids, create decorative patterns, and strengthen structural weaknesses while preserving the wood’s natural beauty. Whether salvaging historic pieces or enhancing contemporary designs, professional wood restoration with epoxy inlays offers unlimited creative possibilities while ensuring lasting durability. From metallic powder additives that create shimming river effects to transparent resins that showcase preserved elements within, epoxy inlay techniques have revolutionized how we approach wood repair and artistic expression in furniture making. Master the fundamentals of this innovative process to unlock new potential in your woodworking projects and breathe new life into treasured pieces that might otherwise be lost to time.

Epoxy in wood restoration offers remarkable benefits that make it a preferred choice for both professionals and DIY enthusiasts. The durability of epoxy-based repairs stands out as its primary advantage, creating bonds that often exceed the strength of the original wood. This enhanced strength means restored pieces can withstand daily use and environmental stresses for years to come.
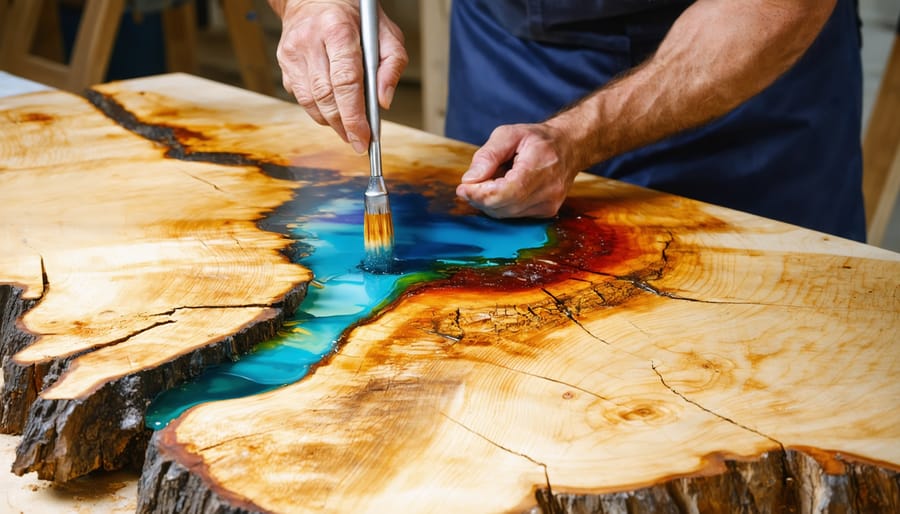
The aesthetic versatility of epoxy allows for creative solutions in wood restoration. It can be tinted to match any wood tone perfectly, making repairs virtually invisible. When used for inlays, epoxy can create stunning visual effects, from transparent river-like patterns to vibrant colored designs that complement the natural wood grain.
Another significant advantage is epoxy’s ability to fill and stabilize damaged areas completely. Unlike traditional wood fillers, epoxy penetrates deep into the wood fibers, preventing further deterioration while providing structural support. This makes it particularly valuable for salvaging antique pieces or addressing extensive damage that would otherwise render furniture unusable.
The material’s water-resistant properties also make it ideal for pieces exposed to moisture or outdoor conditions. Once cured, epoxy creates a protective barrier that helps prevent future water damage and decay.
Epoxy inlays excel in situations where traditional wood inlay techniques might fall short. When dealing with irregular shapes, deep voids, or complex patterns, epoxy offers superior flexibility and adaptability compared to conventional wooden inlays. Our custom woodworking solutions often incorporate epoxy inlays for pieces exposed to moisture or temperature fluctuations, as the material provides better stability and longevity.
Choose epoxy when working with live edge furniture, where natural wood gaps and cracks require a durable, transparent filling. It’s also ideal for contemporary designs featuring bold colors or metallic effects, which aren’t achievable with traditional wood inlays. In restoration projects where matching historic wood species is impossible or cost-prohibitive, epoxy can be tinted to replicate the original appearance while offering superior protection.
Epoxy is particularly valuable for high-traffic commercial spaces or outdoor furniture, where traditional inlays might loosen or deteriorate. Its waterproof properties and resistance to UV damage make it perfect for pieces that need to withstand challenging environmental conditions while maintaining their aesthetic appeal.
Choosing the right epoxy for wood inlay work is crucial for achieving professional results. For standard decorative inlays, a clear casting epoxy with a minimum working time of 30 minutes provides the ideal balance of workability and durability. These formulations typically come in a two-part system with a 1:1 mixing ratio, making them user-friendly for both beginners and experts.
When working with deeper voids or larger inlay areas, opt for a deep-pour epoxy that’s specifically designed to handle thicker applications without overheating. These specialized formulas, while more expensive, prevent bubbling and cracking that can occur with standard epoxy repair techniques.
For intricate detail work, consider using a quick-set epoxy with a shorter cure time of 5-10 minutes. However, only use these for small areas where you can work quickly and confidently. Always check the manufacturer’s temperature recommendations, as most epoxies perform best between 70-75°F (21-24°C). Remember to choose UV-resistant formulations for pieces that will be exposed to sunlight to prevent yellowing over time.
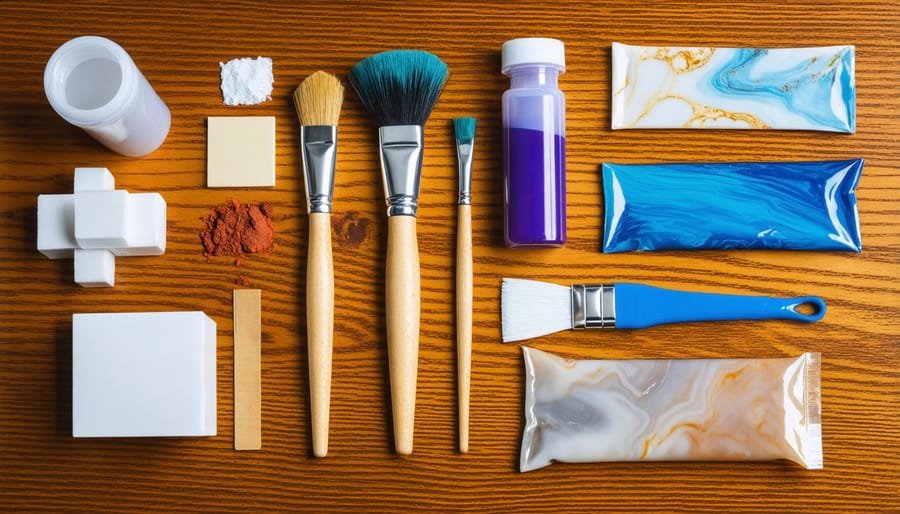
To achieve professional results in wood inlay epoxy work, you’ll need a carefully selected set of quality tools. Start with a reliable rotary tool or router for creating precise channels and cleaning existing inlays. A digital caliper ensures accurate measurements, while a set of sharp chisels helps define edges and remove excess material.
For epoxy application, invest in high-quality mixing cups with clear measurement markings and several sizes of spreading tools, including plastic putty knives and silicone spatulas. A heat gun helps eliminate bubbles in the epoxy, while a UV-blocking light source assists in controlling cure times for sensitive projects.
Safety equipment is equally important – wear chemical-resistant gloves, protective eyewear, and a respirator rated for chemical vapors. Keep a supply of mixing sticks, lint-free cloths, and isopropyl alcohol for cleanup. A laser level and straight edge guide ensure perfectly aligned inlays, while fine-grit sandpaper (220-400 grit) and polishing compounds help achieve that mirror-like finish.
Remember to maintain your tools properly, cleaning them thoroughly after each use to ensure longevity and consistent results in future projects.
Proper surface preparation is crucial for achieving a successful wood inlay epoxy application. Begin by thoroughly cleaning the wood surface using a mild detergent solution and warm water, removing any dirt, grease, or debris. Once cleaned, allow the surface to dry completely for at least 24 hours in a well-ventilated area.
Next, sand the entire surface using progressively finer grits of sandpaper, starting with 80-grit and working up to 220-grit. This creates an optimal surface texture for epoxy adhesion while following proven historic wood restoration techniques. Pay special attention to the inlay areas, ensuring edges are smooth and well-defined.
After sanding, remove all dust using a tack cloth or vacuum with a brush attachment. For deeper cleaning of the wood grain, wipe the surface with denatured alcohol, which helps remove any remaining oils or residues that could interfere with the epoxy bond. Allow the alcohol to evaporate completely before proceeding with the epoxy application. Remember to work in a dust-free environment and wear appropriate protective equipment throughout the preparation process.
Successful epoxy application begins with proper surface preparation. Ensure the wood is clean, dry, and free from dust or debris. For optimal adhesion, lightly sand the inlay area and vacuum thoroughly before proceeding.
Start by mixing your epoxy according to the manufacturer’s instructions, typically using a 1:1 ratio of resin to hardener. Mix thoroughly but slowly to avoid introducing air bubbles, which can compromise the final finish. Consider using a clear epoxy for most applications, though tinted varieties can create stunning effects when desired.
Pour the epoxy in stages rather than all at once. Begin with a thin seal coat to prevent air from being trapped in the wood grain. Allow this initial layer to partially cure until tacky, usually 2-4 hours depending on the product and conditions. This creates the ideal surface for subsequent pours.
For deeper inlays, build up layers gradually, with each pour approximately 1/8 to 1/4 inch thick. This technique prevents excessive heat buildup during curing and reduces the likelihood of bubbles or shrinkage. Use a heat gun or torch briefly across the surface to release any trapped air bubbles, moving quickly to avoid overheating the epoxy.
Level each pour using a spreader or trowel, ensuring even distribution across the inlay area. Work methodically from one end to the other, maintaining a wet edge to prevent lap marks. For intricate designs, use precision tools like syringes or small spatulas to direct the epoxy into detailed areas.
Remember to work in a dust-free environment with consistent temperature (around 70°F) for best results. Allow adequate curing time between layers and protect the work area from debris during the entire process.
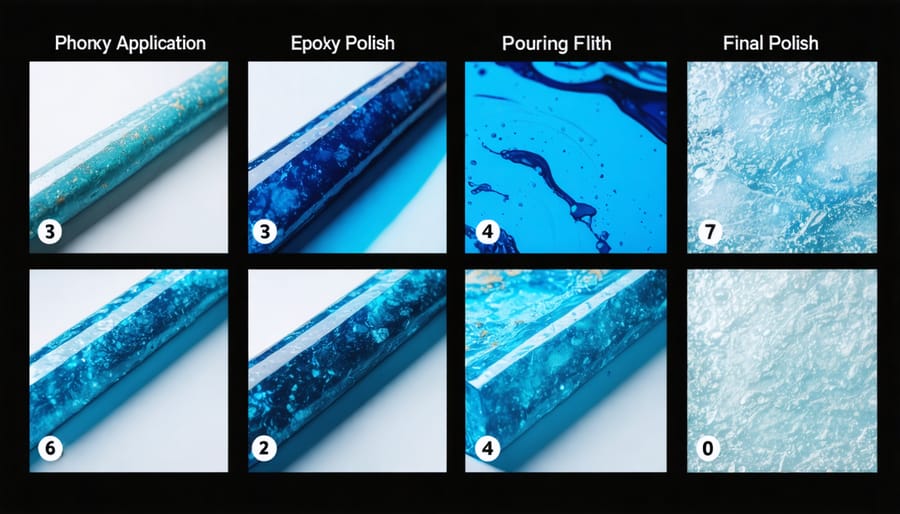
Once your epoxy inlay has fully cured, the finishing process begins – a crucial step that transforms your work from good to exceptional. Start by carefully sanding the surface with progressively finer grits, beginning with 120-grit and working your way up to 320-grit sandpaper. This methodical approach, similar to traditional woodworking methods, ensures a smooth transition between the wood and epoxy surfaces.
For optimal results, use a random orbital sander on larger areas, switching to hand sanding for edges and detailed sections. Pay special attention to the boundaries where epoxy meets wood, as these areas often need extra care to achieve a seamless blend. Once you’ve completed the initial sanding, wipe the surface clean with a tack cloth to remove all dust particles.
The final polish involves using ultra-fine grits (400-800) or specialized polishing compounds designed for epoxy. Apply your chosen wood finish – whether it’s polyurethane, Danish oil, or another protective coating – following manufacturer’s instructions. For high-gloss results, consider wet-sanding with 1000-grit or higher, followed by buffing with a polishing compound. Remember to allow adequate drying time between coats and maintain proper ventilation throughout the process. The end result should be a smooth, professional finish that highlights both the natural beauty of the wood and the crystal clarity of the epoxy.
Achieving a flawless epoxy inlay starts with proper preparation and technique to prevent bubbles and imperfections. Begin by working in a clean, dust-free environment with a temperature between 70-75°F (21-24°C). Before mixing your epoxy, warm both components slightly in a water bath to reduce viscosity and make bubbles less likely to form.
When mixing the epoxy, stir slowly and deliberately to minimize air incorporation. Use a flat mixing stick rather than a round one, and scrape the sides and bottom of your mixing container thoroughly. After mixing, let the epoxy sit for 5-10 minutes to allow larger air bubbles to rise naturally to the surface.
For application, pour the epoxy in a thin, continuous stream from one end of the inlay to the other. Using a heat gun or torch, pass the flame quickly over the surface at a 45-degree angle, keeping it moving and about 6 inches away from the epoxy. This helps release trapped air bubbles and ensures a glass-like finish.
If you notice any bubbles forming during curing, repeat the heat gun process. For deeper pours, consider working in layers, allowing each to partially cure before adding the next. This layering technique reduces the likelihood of bubble formation and helps maintain clarity throughout the entire inlay.
Even with careful preparation, issues can arise during wood inlay epoxy projects. Here are solutions to common problems you might encounter:
If your epoxy isn’t curing properly, check the mixing ratio – incorrect proportions are often the culprit. Always measure components precisely and mix thoroughly for at least 3-5 minutes. When working in cold conditions, warm both components to room temperature before mixing.
Bubbles in your epoxy can be frustrating, but they’re easily addressed. Use a heat gun or torch to pop surface bubbles, keeping the flame moving constantly to avoid overheating. Pour epoxy in thin layers to minimize bubble formation, and consider using a vacuum chamber for complex pieces.
Color inconsistencies typically result from inadequate mixing or temperature variations. Ensure thorough mixing of colorants and maintain a consistent workspace temperature. If you notice darker or lighter patches, wait for full cure before applying an additional thin layer to even out the appearance.
For epoxy that’s too runny or seeping where it shouldn’t, create barriers with painter’s tape or modeling clay. If the epoxy has already leaked, let it cure completely before carefully removing excess with a chisel or sandpaper.
When dealing with cloudy or yellowing epoxy, UV exposure is usually responsible. Use a UV-resistant formula for pieces that will be exposed to sunlight, or apply a UV-protective finish coat once cured.
Wood inlay epoxy restoration combines artistry with technical expertise to breathe new life into damaged furniture and wooden surfaces. While basic repairs can be tackled as DIY projects, complex restorations often require professional knowledge and experience to achieve optimal results. The success of your project depends on proper material selection, precise preparation techniques, and careful application methods. For intricate designs or valuable pieces, consulting with a certified restoration specialist can help avoid costly mistakes and ensure the longevity of the repair. Remember that each restoration project is unique, and professionals have access to specialized tools and industrial-grade materials that may not be available to the general public. Whether you choose to tackle the project yourself or seek expert help, understanding the fundamentals of wood inlay epoxy will help you make informed decisions about your restoration needs.