
Revive cherished furniture pieces by mastering the art of veneer restoration, a sophisticated yet achievable craft that preserves both value and heritage. Professional restorers consistently demonstrate that learning to repair damaged veneer can transform deteriorating surfaces into stunning showpieces. From delicate marquetry to broad wood panels, veneer restoration combines traditional craftsmanship with modern techniques to breathe new life into antique and contemporary pieces alike. Whether addressing minor delamination or extensive damage, proper veneer repair requires understanding wood species, grain patterns, and adhesive chemistry—skills that bridge technical expertise with artistic appreciation. This comprehensive guide explores essential techniques, material selection, and professional insights to help furniture enthusiasts and property managers make informed decisions about veneer restoration projects.
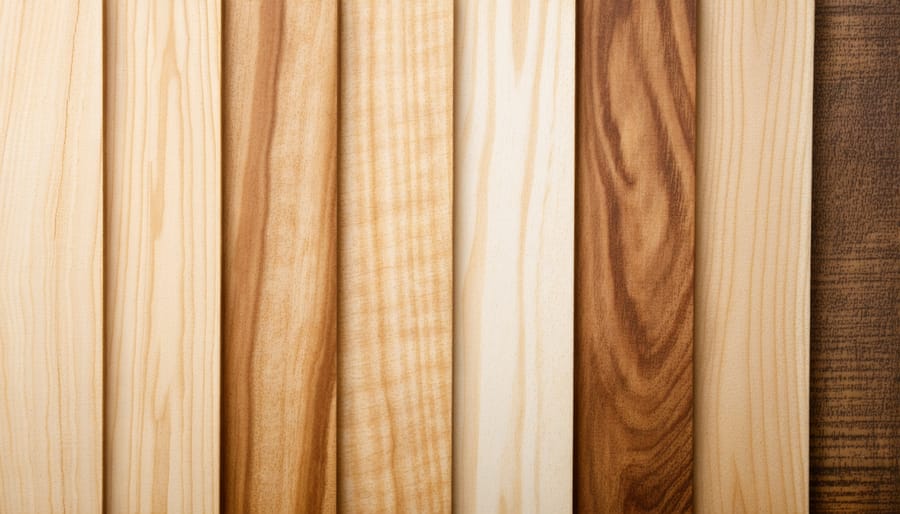
Furniture veneer comes in several distinct types, each offering unique characteristics and aesthetic appeal. Natural wood veneer, sliced from actual timber, remains the most prestigious choice, providing authentic grain patterns and luxurious appearance. Popular species include oak, maple, walnut, and mahogany, each bringing its own color and texture to furniture pieces.
Engineered veneer, made from fast-growing wood species that are dyed and reconstructed, offers consistent patterns and colors, making it ideal for matching existing furniture. This type is particularly resistant to fading and often more affordable than natural options.
Paper-backed veneer features a thin layer of wood bonded to paper, making it easier to work with and less prone to cracking during application. This variety is excellent for DIY projects and curved surfaces.
Reconstituted veneer, created from wood fibers mixed with adhesives and dyes, provides sustainable alternatives that mimic rare or endangered wood species. These veneers offer excellent durability and consistency in color and pattern, making them popular in commercial furniture production.
Veneer damage is a common issue that affects many pieces of furniture, particularly antiques and vintage items. The most frequent problem is delamination, where the veneer separates from the substrate due to weakened adhesive bonds, often caused by moisture exposure or age. Bubbling and blistering can occur when heat or humidity causes the veneer to lift from the surface, creating unsightly raised areas.
Edge damage is another prevalent issue, as these areas are particularly vulnerable to impacts and wear. Chips, cracks, and missing pieces frequently occur along furniture edges and corners. Surface scratches and gouges can range from minor cosmetic issues to deep damages that expose the substrate beneath.
Water damage is particularly destructive to veneered surfaces, causing dark stains, warping, and complete separation of the veneer from the base material. Sun exposure can also take its toll, leading to fading, discoloration, and brittleness that makes the veneer more susceptible to damage.
Even careful owners may encounter veneer problems due to natural aging processes, changes in environmental conditions, or regular use. Identifying these issues early is crucial for successful restoration and preventing further deterioration.
Choosing the right adhesive is crucial for successful veneer restoration, and selecting from the various essential restoration materials can seem overwhelming at first. Hide glue, a traditional choice dating back centuries, remains popular among restoration professionals due to its reversibility and excellent bonding properties. It’s available in both hot and liquid forms, with hot hide glue offering superior strength for antique pieces.
For modern applications, PVA (polyvinyl acetate) wood glue provides excellent results. Yellow carpenter’s glue is particularly effective for general veneer work, while white PVA glue offers a longer working time and cleaner appearance. Both types create strong, water-resistant bonds perfect for everyday furniture.
Contact cement serves well for large flat surfaces and is especially useful when working with paper-backed veneers. However, it requires careful application as it bonds instantly upon contact. For delicate repairs or small areas, conservation-grade adhesives offer precise control and minimal residue.
Two-part epoxy adhesives prove invaluable for challenging situations where moisture resistance and gap-filling properties are necessary. While more expensive, they provide exceptional strength and durability for high-stress areas or valuable pieces.
Remember to always test your chosen adhesive on a small, hidden area first to ensure compatibility with both the veneer and substrate materials.
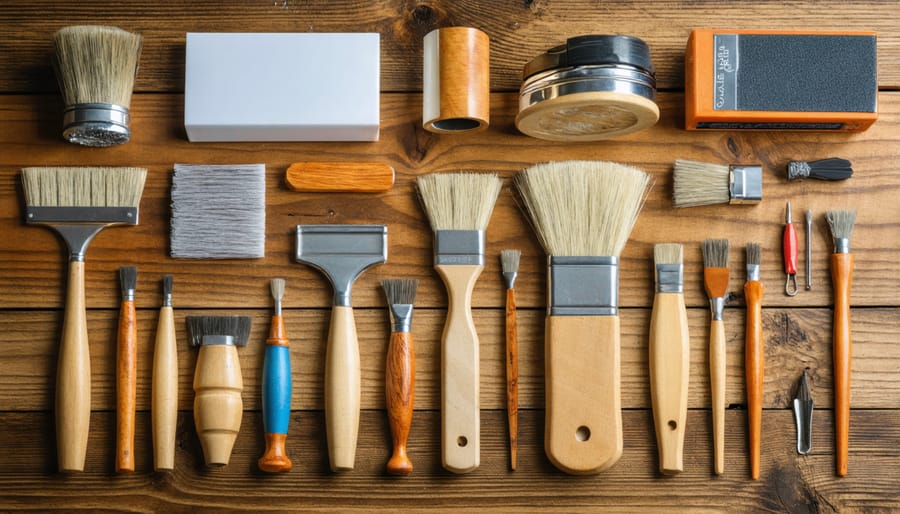
To successfully restore veneered furniture, you’ll need a well-equipped workspace with essential tools and materials. A sharp veneer knife or scalpel is crucial for precise cutting and trimming, while a veneer saw helps with straight cuts and removing damaged sections. A quality scraper or putty knife aids in cleaning old adhesive and preparing surfaces.
For adhesion, you’ll need a set of veneer clamps or a vacuum press system to ensure proper bonding. A flat work surface or pressing cauls are essential for even pressure distribution. Don’t forget about wood glue specifically formulated for veneer work – traditional yellow carpenter’s glue or hide glue are popular choices.
Sanding tools are vital, including various grits of sandpaper (120-220 grit for general work, finer grits for finishing) and sanding blocks. A heat gun or iron can help soften old adhesive and flatten bubbled veneer, but use these with caution to avoid damage.
Additional helpful tools include:
– Small brushes for glue application
– Clean cloths for wiping excess glue
– Measuring tools and straight edge
– Sharp pencil for marking
– Masking tape for temporary holding
– Moisture meter to check wood conditions
– Safety equipment (gloves, eye protection, dust mask)
Having these tools readily available ensures you’re prepared for most veneer restoration challenges and helps achieve professional-quality results.
When dealing with loose veneer, proper lifting and re-gluing techniques are essential classic furniture restoration techniques that can save valuable pieces from further damage. Begin by carefully inspecting the affected area to determine the extent of separation. Using a thin putty knife or specialized veneer lifter, gently work the tool under the loose section, taking care not to crack or split the veneer.
Before applying new adhesive, thoroughly clean both the underside of the veneer and the substrate surface. Remove all traces of old glue using a scraper and fine sandpaper. For best results, use hide glue or a high-quality wood adhesive specifically designed for veneer work. Apply the adhesive evenly using a small brush or spreader, ensuring complete coverage without excess.
Press the veneer back into position using veneer tape or clamps to maintain pressure while the adhesive cures. For curved surfaces, use specialized veneer pressing cauls that match the furniture’s contours. Allow the piece to dry completely according to the adhesive manufacturer’s instructions – typically 24 hours for optimal bonding strength. Once cured, carefully remove any veneer tape and clean the surface. Light sanding may be necessary to achieve a smooth finish that matches the surrounding area.
When dealing with damaged veneer sections, proper patching and replacement techniques are essential for a seamless restoration. Start by carefully removing the damaged veneer using a sharp utility knife and a putty knife, ensuring you don’t harm the underlying wood. For small areas, you can create patches from matching veneer pieces, cutting them slightly larger than the damaged area.
Before applying new veneer, thoroughly clean the substrate and ensure it’s completely flat. Apply a high-quality wood glue evenly across the surface, then position the replacement piece. Use a veneer hammer to work out any air bubbles, starting from the center and moving outward. For larger sections, consider using veneer tape to hold the piece in place while the adhesive cures.
When working with curved surfaces, pre-moistening the veneer can help it conform to the shape without cracking. For complex patterns or marquetry, careful matching of grain patterns and colors is crucial for an invisible repair. After the glue has dried completely, sand the edges carefully to blend the new section with the surrounding veneer.
For antique pieces, sourcing period-appropriate veneer may require visiting specialty suppliers or salvage yards. Some restorers keep a library of vintage veneers specifically for matching historical pieces. Remember that proper climate control during and after the repair is essential, as humidity changes can affect the success of your patch.

The final stage of veneer restoration requires careful attention to detail to achieve a seamless blend between the restored area and the surrounding surface. Begin by carefully color-matching the restored veneer using specialized wood stains or toners. Apply these in thin layers, gradually building up the color until it perfectly matches the original finish. Remember that natural wood often has subtle variations, so don’t aim for absolute uniformity.
Once the color match is satisfactory, apply a seal coat of clear finish to protect the stain. After this dries, lightly sand with ultra-fine grit sandpaper (400-600 grit) to ensure a smooth surface. Clean thoroughly with a tack cloth to remove any dust particles before proceeding with the final finish coats.
For the topcoat, choose a finish that matches the sheen and type of the original piece. Whether it’s shellac, lacquer, or polyurethane, apply multiple thin coats rather than one thick coat for the best results. Between coats, light sanding helps achieve a glass-like smoothness. The final coat should be applied in a dust-free environment and allowed to cure completely.
To evaluate your work, examine the restored area under different lighting conditions. The restoration should be virtually undetectable, with grain patterns flowing naturally across the repaired section. Professional restorers often use a combination of artificial and natural light to ensure their work stands up to scrutiny from all angles.
Proper maintenance of restored veneer furniture is crucial for preserving its beauty and extending its lifespan. To effectively maintain restored furniture, follow these essential preventive care guidelines.
First, control your furniture’s environment. Keep pieces away from direct sunlight, which can fade and damage the veneer. Maintain consistent room temperature and humidity levels, as extreme fluctuations can cause the veneer to separate from the substrate. Use a humidity monitor and maintain levels between 40-50%.
Regular cleaning is vital but must be done correctly. Use a soft, lint-free cloth slightly dampened with water or specialized wood cleaner. Avoid harsh chemicals or excessive moisture, which can seep under the veneer edges. Always wipe in the direction of the wood grain and dry immediately with a clean cloth.
Apply a quality furniture polish or wax every 3-4 months to protect the surface. Choose products specifically designed for veneered furniture, and test them on an inconspicuous area first. Avoid silicone-based products, as they can build up over time and cause future refinishing difficulties.
Place protective pads under any items that will sit on the veneered surface. Use coasters under drinks and placemats under serving dishes to prevent moisture rings and heat damage. Consider using felt pads under decorative items to prevent scratches.
Inspect your furniture regularly for early signs of damage. Look for lifting edges, bubbling, or color changes. Address any issues promptly to prevent them from worsening. When moving furniture, always lift rather than drag to avoid catching and tearing the veneer.
Remember to dust frequently with a soft cloth or feather duster, as dust particles can scratch the surface over time. Keep sharp objects away from veneered surfaces and teach family members proper care techniques to ensure everyone follows the same maintenance routine.
Restoring and maintaining veneer furniture requires attention to detail, proper techniques, and regular care, but the results are well worth the effort. Throughout this guide, we’ve explored the essential aspects of veneer restoration, from identifying different types of veneers to mastering repair techniques and selecting the right tools and materials.
Remember that successful veneer restoration starts with proper assessment and preparation. Taking time to identify the type of veneer, extent of damage, and appropriate repair method will significantly impact your results. Whether dealing with loose edges, bubbling, or missing sections, each repair should be approached methodically and with patience.
Regular maintenance is crucial for preserving your restored veneer furniture. Keep pieces away from direct sunlight and extreme temperature changes, clean surfaces gently with appropriate products, and address any damage promptly to prevent further deterioration. Consider using furniture wax or polish specifically designed for veneered surfaces to maintain their beauty and protection.
For complex restoration projects or valuable antiques, don’t hesitate to seek professional assistance. Expert restorers have the skills, tools, and experience to handle challenging repairs while preserving your furniture’s historical and aesthetic value.
With proper care and attention, your veneered furniture can continue to be both beautiful and functional for generations to come, maintaining its charm and character while telling its unique story through time.