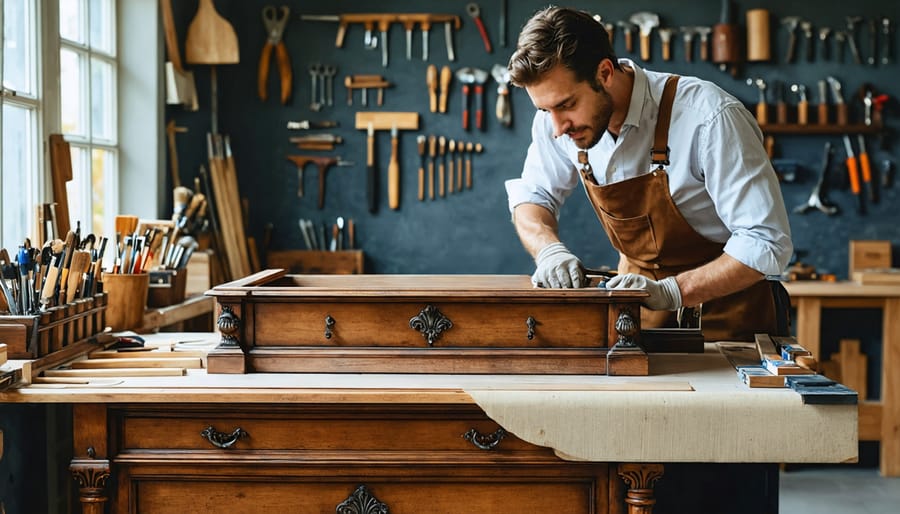
Transform worn furniture into cherished masterpieces at our Sage Restoration Workshop, where time-honored techniques meet modern craftsmanship. Master artisans guide participants through hands-on restoration processes, from gentle surface preparation to applying the perfect patina. Whether rescuing a Victorian sideboard or revitalizing mid-century modern pieces, our workshop combines practical skills with sustainable restoration practices.
Each intimate session equips restorers with professional-grade tools and sage-inspired natural finishing solutions, ensuring environmentally conscious results without compromising quality. Participants learn essential techniques like wood joining, veneer repair, and traditional finishing methods while discovering the art of color matching and period-appropriate restoration approaches.
Beyond technical skills, our workshop embraces the philosophy of mindful restoration, teaching participants to recognize each piece’s historical significance and structural integrity. Small class sizes ensure personalized attention, while our fully-equipped workspace provides the ideal environment for both beginners and experienced restorers to hone their craft.
Join a community of passionate furniture preservationists and unlock the secrets of professional restoration in a space where creativity, craftsmanship, and sustainability converge. Our Sage Workshop stands as a testament to the enduring value of quality furniture restoration and the artisans who keep this vital craft alive.
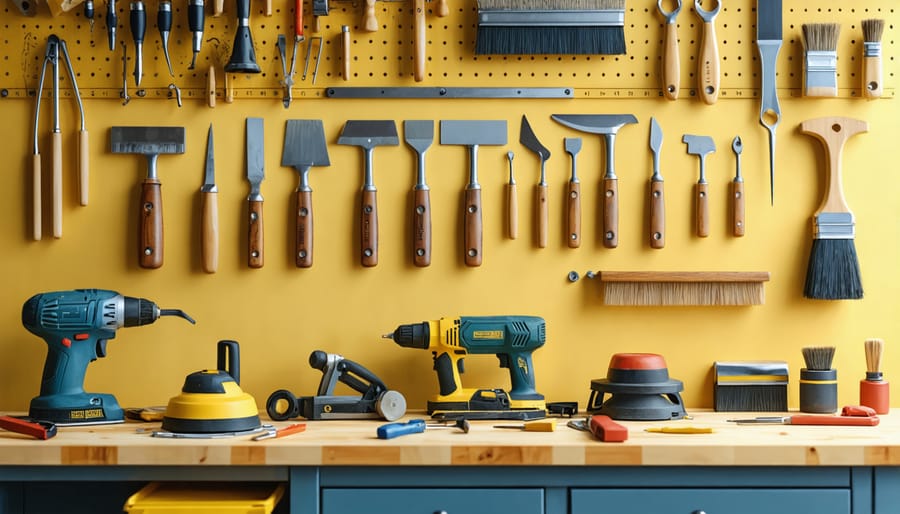
Every successful furniture restoration project begins with having the right essential restoration tools at your disposal. A well-equipped basic toolkit should include both hand tools and safety equipment to ensure quality results and personal protection.
Start with a selection of quality sanders: a random orbital sander for larger surfaces and detail sanders for intricate areas. Include various grits of sandpaper ranging from coarse (60-grit) to ultra-fine (220-grit) for different restoration stages.
Essential hand tools include a sturdy hammer, flathead and Phillips screwdrivers, wood chisels in various sizes, and a reliable putty knife. A moisture meter is invaluable for checking wood condition, while a quality set of clamps will secure pieces during gluing and repair work.
For finishing work, invest in good-quality brushes and applicators. Natural bristle brushes work best for oil-based finishes, while synthetic brushes are ideal for water-based products. Don’t forget cleaning supplies like mineral spirits, steel wool, and tack cloths.
Safety should never be overlooked. Your kit must include protective gear: safety glasses, dust masks or respirators, work gloves, and ear protection when using power tools. Having these items readily available ensures you can tackle restoration projects safely and efficiently while achieving professional results.
Safety should always be your top priority when undertaking furniture restoration projects. Following proper workshop safety guidelines can prevent accidents and ensure a successful restoration experience.
Essential protective equipment includes safety glasses to shield your eyes from wood dust, chemicals, and flying debris. A properly fitted respirator mask is crucial when working with finishes, strippers, or sanding materials that produce harmful particles. Choose filters appropriate for both dust and chemical vapors.
Thick work gloves are necessary when handling sharp tools or caustic chemicals. Select chemical-resistant gloves for stripping and finishing tasks, and heavy-duty work gloves for handling rough materials. Hearing protection is essential when using power tools like sanders and saws.
Keep a well-stocked first aid kit readily accessible in your workshop. Install proper ventilation systems or work in well-ventilated areas, especially when using chemical products. An eyewash station or emergency shower is recommended for workshops handling strong chemicals.
Wear close-toed shoes with non-slip soles and avoid loose clothing that could get caught in machinery. Consider keeping a fire extinguisher rated for chemical fires nearby, and always have emergency contact numbers posted in visible locations.
Remember, investing in quality safety equipment is more cost-effective than dealing with potential injuries or health issues later. Regular maintenance and replacement of worn safety gear ensure continued protection throughout your restoration projects.
Before beginning any restoration project, a thorough assessment of the furniture piece is essential to ensure successful results. Start by documenting the item’s current condition through detailed photographs and notes, paying special attention to damaged areas, missing components, and original finishes. This documentation becomes invaluable during the furniture transformation process and helps track progress.
Examine the piece’s construction method, including joints, hardware, and materials used. Look for maker’s marks or labels that might indicate age and origin, as this information guides appropriate restoration techniques. Test the stability of joints and note any structural issues that require immediate attention.
Create a detailed restoration plan that outlines necessary repairs, required materials, and estimated timeline. Consider whether specialized tools or expertise will be needed, and determine if any parts need to be custom-fabricated. Document your intended approach for each repair, including finish matching and hardware replacement strategies.
Remember to assess the piece’s historical value before proceeding. Some antiques may actually decrease in value if restored incorrectly, so consulting with an expert might be warranted for significant pieces. Keep all documentation, including material selections and color matches, in a project file for future reference.
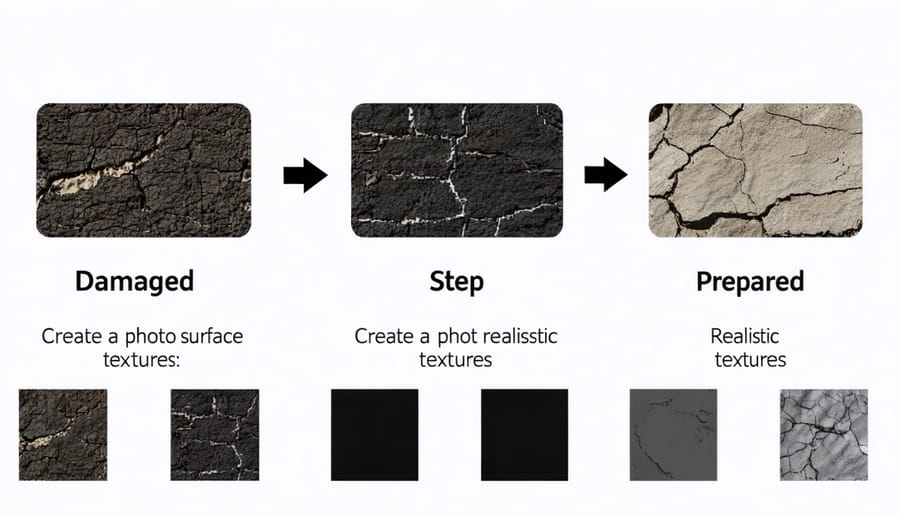
Proper surface preparation is the foundation of successful furniture restoration. Before applying any finishes or treatments, it’s essential to thoroughly clean and prepare the surface using proven surface restoration techniques that protect the integrity of your piece.
Begin by carefully cleaning the furniture with a mild soap solution and soft cloth to remove accumulated dirt and grime. For stubborn residues, a mixture of equal parts white vinegar and water can effectively break down old wax and polish without damaging the wood. Always test cleaning solutions on an inconspicuous area first.
When stripping old finishes, choose your method based on the existing finish and wood type. Chemical strippers work well for most varnishes and lacquers, while heat guns are excellent for paint removal on sturdy pieces. For delicate antiques, opt for gentler citrus-based strippers that work more slowly but pose less risk to the wood.
After stripping, neutralize any chemical residues and allow the piece to dry completely. Sand the surface progressively, starting with medium-grit sandpaper (120-grit) and working your way to fine-grit (220-grit) for a smooth finish. Pay special attention to the grain direction to avoid cross-grain scratches that might show through the final finish.
For surfaces with minor imperfections, wood fillers matched to your piece’s color can effectively repair small holes and scratches. Deep gouges may require wood putty or epoxy fillers, which should be carefully colored to match the surrounding area.
Finally, remove all sanding dust using a tack cloth or vacuum with a soft brush attachment. A thorough cleaning with mineral spirits will remove any remaining residue and prepare the surface for your chosen finish. Remember that patience during this preparation phase will significantly impact your restoration’s final quality and longevity.
The final stage of furniture restoration is where true craftsmanship shines through. Our professional finishing process begins with meticulous surface preparation, ensuring every piece is smooth and ready for its protective layers. We employ a variety of finishing techniques, from traditional hand-rubbed oils to modern catalyzed lacquers, each selected to match the piece’s historical context and intended use.
For antique pieces, we often recommend French polishing, a time-honored technique that creates a deep, lustrous finish through the careful application of shellac. This method, while labor-intensive, produces an authentically aged appearance that’s particularly suited to period furniture. For contemporary pieces, we might opt for more durable water-based polyurethanes that offer superior protection while maintaining a natural look.
Color matching is another crucial aspect of our finishing process. Our specialists use a combination of stains, glazes, and toners to achieve precise color matches that blend seamlessly with existing finishes. This attention to detail ensures restored areas are indistinguishable from the original surface.
Protection goes beyond aesthetic appeal. We apply appropriate sealers and top coats that shield furniture from UV damage, moisture, and daily wear. For dining tables and high-use surfaces, we recommend multiple layers of protective finish to ensure longevity. Each layer is carefully applied and allowed proper curing time, resulting in a finish that’s both beautiful and durable.
Environmental considerations are also paramount in our finishing process. We prioritize low-VOC products and water-based finishes when appropriate, ensuring the safety of both our craftspeople and our clients. Our workshop is equipped with professional-grade ventilation systems and proper disposal protocols for all finishing materials.
After the final coat, each piece undergoes a thorough quality inspection and receives specific care instructions to help maintain its restored beauty. We take pride in delivering results that not only meet but exceed our clients’ expectations, ensuring their cherished furniture pieces will continue to be enjoyed for generations to come.
Water damage can be one of the most challenging issues in furniture restoration, but with the right approach, even severely affected pieces can often be salvaged. The first step is always to thoroughly dry the piece, using dehumidifiers and fans to prevent mold growth and further deterioration. For best results, this process should begin within 48 hours of water exposure.
White rings from water marks on wooden surfaces can often be addressed using a combination of gentle heat and moisture control. A tried-and-true method involves placing a clean, white cloth over the affected area and applying a warm iron on low heat, moving it continuously to prevent scorching. This technique helps to draw out trapped moisture from the finish.
For more severe cases where water has caused wood swelling or veneer separation, we employ specialized techniques such as controlled drying chambers and targeted pressure applications. Deep water damage often requires carefully removing and replacing affected veneer sections while preserving as much of the original material as possible.
When dealing with upholstered furniture, immediate action is crucial. We completely strip affected upholstery and padding, thoroughly dry the frame, and treat it with appropriate anti-microbial solutions before rebuilding. This comprehensive approach ensures not only aesthetic restoration but also prevents future issues with mold or structural integrity.
Our success story with the Victorian settee that survived a basement flood demonstrates how even extensively damaged pieces can be brought back to life with proper restoration techniques and patience.
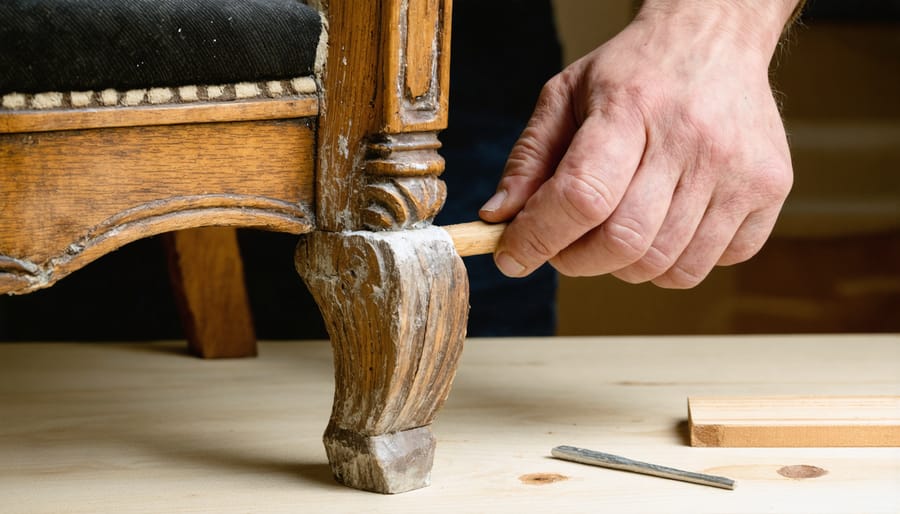
At the heart of furniture restoration lies the critical task of structural repair, where we address issues that compromise both stability and safety. Our experienced craftsmen employ time-tested techniques to restore integrity to weakened joints, loose legs, and compromised frame components.
For loose mortise and tenon joints, we carefully disassemble the affected areas, clean out old glue residue, and apply professional-grade wood adhesives specifically formulated for antique furniture. When dealing with broken chair spindles or table legs, we utilize custom-turned replacements that match the original wood species and design perfectly.
Severe structural damage often requires reinforcement techniques such as corner blocking or the installation of metal brackets, always ensuring these additions remain hidden from view. For split wood components, we implement butterfly joints or splines to prevent further separation while maintaining the piece’s aesthetic appeal.
Our approach to regluing involves specialized clamps and precise pressure application to ensure proper adhesion without damaging the surrounding wood. In cases where original joinery has failed, we may recommend modern mechanical fastening methods, though always with consideration for the piece’s historical value.
Each repair is thoroughly tested for stability before moving on to cosmetic restoration phases. This methodical approach ensures that restored pieces not only look beautiful but also provide years of reliable service for our clients.
Embarking on a furniture restoration journey opens up a world of possibilities for breathing new life into cherished pieces. Through our workshop sessions, we’ve witnessed countless success stories of participants transforming worn-out furniture into stunning showpieces, all while developing valuable skills that last a lifetime.
The art of furniture restoration combines technical expertise with creative vision, and our sage-level workshops provide the perfect foundation for both. Whether you’re a homeowner looking to restore family heirlooms or a property manager seeking to maintain valuable assets, the techniques and insights shared in our workshops offer practical solutions for every restoration challenge.
We encourage you to take the next step in your furniture restoration journey by joining our upcoming workshops. Not only will you gain hands-on experience with professional-grade tools and materials, but you’ll also become part of a supportive community of fellow restoration enthusiasts. Our expert instructors are committed to ensuring each participant masters the essential skills while building confidence in their abilities.
Remember, every piece of furniture tells a story, and through proper restoration techniques, you can help preserve these stories for generations to come. Don’t let valuable pieces deteriorate when you have the power to restore them to their former glory. Join us in our next workshop session and discover the satisfaction of bringing beautiful furniture back to life.