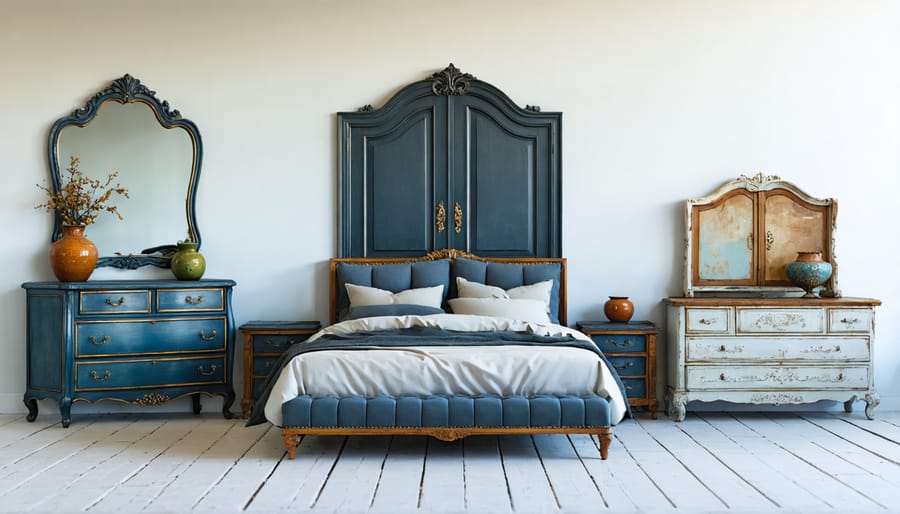
Transform outdated bedroom furniture into designer-worthy pieces without breaking the bank. Modern upcycling techniques let you transform old furniture into custom masterpieces that reflect your personal style while preserving cherished pieces. Whether refreshing a vintage dresser with chalk paint and new hardware, converting an antique headboard into a statement bench, or reimagining nightstands with decorative overlays, bedroom furniture upcycling delivers dramatic results with minimal investment. This comprehensive guide walks through professional-grade techniques for preparing surfaces, selecting materials, and executing high-impact transformations that rival custom pieces. From basic refinishing to advanced architectural details, discover how to breathe new life into existing bedroom furniture while adding thousands in perceived value to your space.
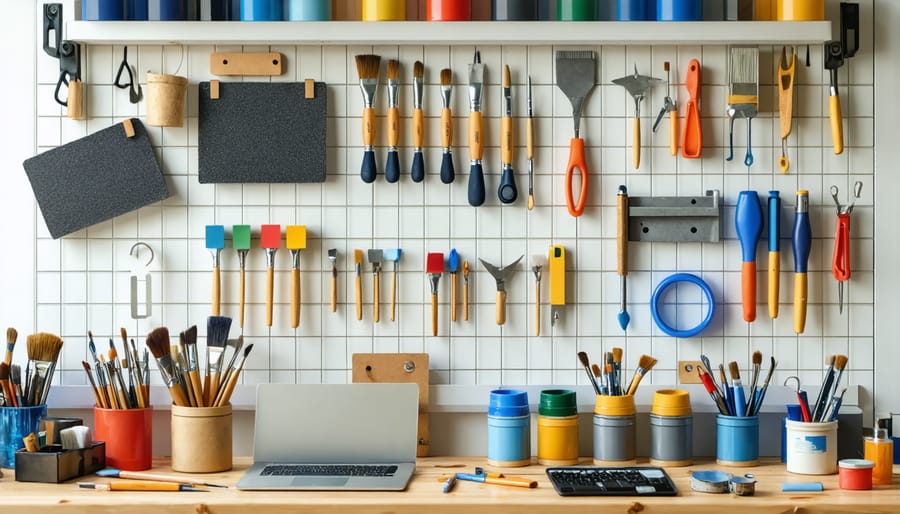
Before diving into your furniture upcycling project, gather these essential tools to ensure smooth execution. Start with a quality sanding kit, including both medium and fine-grit sandpaper, and an electric sander for larger surfaces. A basic tool set should include a hammer, screwdrivers (both Phillips and flathead), pliers, and a measuring tape.
For surface preparation and painting, you’ll need cleaning supplies, tack cloths, primers, and brushes of various sizes. Invest in both foam rollers and quality paintbrushes for different finishes. A drop cloth will protect your workspace, while painter’s tape ensures clean lines.
Don’t forget safety equipment: protective goggles, work gloves, and a dust mask are non-negotiable. For hardware updates, keep a power drill with various bits handy. Other useful tools include wood filler for repairs, a putty knife for application, and a level for perfect alignment.
If you plan to refinish surfaces, add a paint stripper, scraper, and steel wool to your arsenal. A utility knife and scissors will help with detailed work, while a small craft brush set enables decorative touches.
Selecting the right paint and finish is crucial for ensuring your upcycled bedroom furniture stands the test of time. For wooden pieces, chalk paint has become a favorite among DIY enthusiasts due to its excellent adhesion and matte finish, requiring minimal surface preparation. Milk paint offers an authentic vintage look and is perfect for creating a distressed appearance on dressers and bedside tables.
For metal furniture elements, such as bed frames or drawer handles, opt for specialized metal paints with rust-preventing properties. These typically require a proper primer coat for optimal results. When working with laminate or melamine surfaces, use adhesion primers specifically designed for these materials before applying your chosen paint.
For durability, consider water-based polyurethane for high-traffic surfaces like dresser tops and nightstands. Oil-based finishes provide superior protection but require longer drying times and proper ventilation. For a child’s bedroom furniture, non-toxic, low-VOC paints are essential, while pieces meant for master bedrooms can benefit from premium finishes with sophisticated sheens like pearl or metallic.
Always test your chosen paint and finish combination on a small, hidden area first to ensure compatibility and desired results.
Transform your bedroom furniture with stunning painted finishes and decorative effects that can breathe new life into tired pieces. By mastering these expert upcycling techniques, you can create unique, personalized pieces that reflect your style.
Start with classic chalk paint for a vintage, matte finish that’s perfect for dressers and nightstands. This forgiving medium requires minimal preparation and creates a beautiful, distressed look when sanded at the edges. For a more contemporary feel, try color washing or dry brushing techniques, which add depth and texture while allowing some of the original wood grain to show through.
Create striking effects with metallic accents using gold or silver leaf on drawer pulls, trim, or decorative elements. The glamorous finish catches light beautifully and adds an upscale touch to any piece. For a modern twist, experiment with color blocking or geometric patterns using painter’s tape to create clean, crisp lines.
Consider specialty finishes like crackle medium for an authentically aged appearance, or try a milk paint wash for a time-worn, farmhouse aesthetic. Stenciling intricate patterns or hand-painting delicate designs can transform plain surfaces into statement pieces. Remember to seal your work with an appropriate protective finish to ensure your artistic efforts stand the test of time.
One of the quickest and most impactful ways to transform bedroom furniture is by updating the hardware. Replacing old, dated handles, knobs, and pulls can instantly modernize a piece while maintaining its vintage charm. Start by measuring the existing hardware’s mounting holes – this is crucial for ensuring your new pieces will fit perfectly.
Consider mixing metals for an eclectic look, such as combining brass and black matte finishes, or stick to a cohesive theme with matching pieces throughout. Popular choices include brushed nickel for a modern aesthetic, antique brass for vintage appeal, or crystal knobs for glamorous touches. When selecting new hardware, ensure it complements both the style of your furniture and your room’s overall design scheme.
For dresser drawers, try installing cup pulls instead of traditional knobs for an upgraded look. Large statement handles can transform plain wardrobes into focal pieces, while delicate glass knobs add elegance to bedside tables. Don’t forget about hinges and drawer slides – updating these functional elements can improve both appearance and usability.
Before installation, fill any unused holes with wood filler and sand smooth. Consider adding backplates behind new pulls for extra visual interest or to cover existing marks. Always pre-drill new holes carefully to prevent wood splitting, and use appropriate screws for your chosen hardware.
Before diving into aesthetic transformations, ensuring your furniture’s structural integrity is crucial. Many vintage pieces require basic essential repair skills to become functional and safe for daily use. Common repairs include reinforcing loose joints, replacing damaged wood sections, and stabilizing wobbly legs.
For loose joints, start by removing old glue residue and applying fresh wood glue, then secure with clamps until completely dry. Drawer runners often need attention – replace worn tracks or add reinforcing strips to ensure smooth operation. For damaged veneer, carefully remove loose sections and apply new veneer using contact cement.
Structural modifications can transform functionality while preserving character. Consider adding internal supports to strengthen sagging shelves or converting an old dresser into a window seat by removing drawers and adding a cushioned top. Split drawer units can become bedside tables, while tall dressers might be reimagined as wardrobes with the addition of a hanging rod.
Always assess weight-bearing capacity before modifications, particularly when changing a piece’s intended use. Use appropriate wood screws, brackets, and supports to ensure safety. For pieces with historical value, document original features before making permanent changes, allowing for potential future restoration.
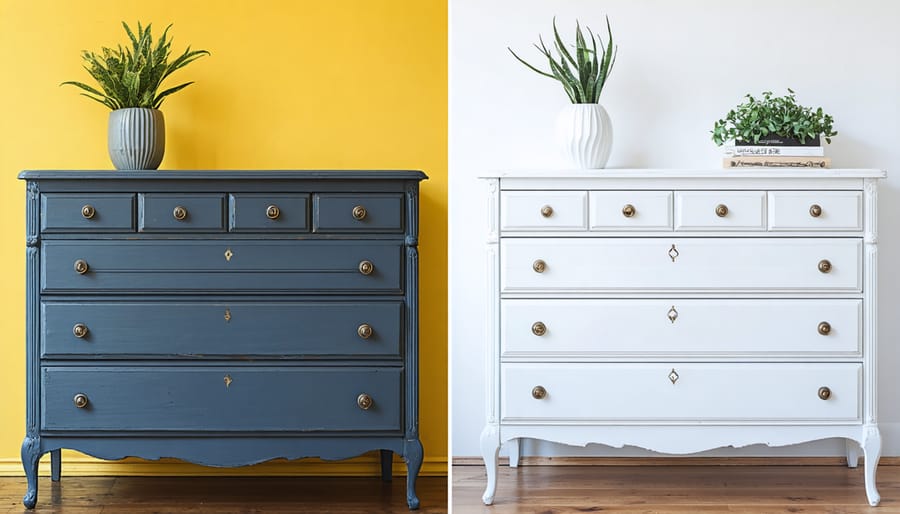
Transform an outdated dresser into a stunning centerpiece with this comprehensive revival guide. Before beginning your vintage-inspired transformations, thoroughly clean the piece using a mild wood cleaner and assess any repairs needed.
Start by removing all hardware and drawers, labeling each piece for easy reassembly. Sand the entire surface using 120-grit sandpaper, followed by 220-grit for a smooth finish. Fill any scratches or dents with wood filler, allowing it to dry completely before sanding flush with the surface.
For a professional finish, apply a quality primer designed for furniture. Once dry, sand lightly with 320-grit sandpaper. Choose your paint carefully – chalk paint offers excellent coverage and a beautiful matte finish, while milk paint creates an authentic aged appearance. Apply two to three thin coats, sanding lightly between each layer.
Consider updating the hardware with vintage-style pulls or modern alternatives to complement your design vision. For added character, try these designer touches:
– Create a two-tone effect by painting drawers in a contrasting color
– Apply decorative transfers or stencils for unique patterns
– Distress edges slightly for an aged appearance
– Line drawers with contemporary wallpaper
Finish with a protective topcoat – wax for chalk paint or polyurethane for traditional paint finishes. Allow the piece to cure for 24-48 hours before returning drawers and adding items. Regular maintenance with furniture polish will help preserve your restored dresser’s beauty for years to come.
Transform your outdated nightstand into a stunning bedroom accent piece with this straightforward makeover process. Start by thoroughly cleaning the surface with a gentle degreasing solution and lightly sanding any rough spots or old finish. Fill any holes or scratches with wood filler, allowing it to dry completely before sanding smooth.
For a modern look, remove old hardware and replace it with contemporary pulls or knobs. Consider adding architectural details like decorative molding or overlay panels to plain drawer fronts for extra visual interest. Prime the surface if you’re making a dramatic color change or working with dark wood.
Choose a paint finish that suits your style – chalk paint offers excellent coverage and a matte finish, while milk paint provides a vintage appeal. Apply thin, even coats using a foam roller for smooth surfaces and a quality brush for details. Wait for each coat to dry completely before applying the next.
For added durability, seal your work with a clear topcoat. Consider creative touches like painting the inside of drawers in a contrasting color or adding wallpaper to drawer bottoms. For maximum impact, update the top surface with marble contact paper, a mirror insert, or sealed decorative tiles.
Complete the transformation by styling your refreshed nightstand with a curated selection of bedside essentials and decorative elements that complement your bedroom’s aesthetic.
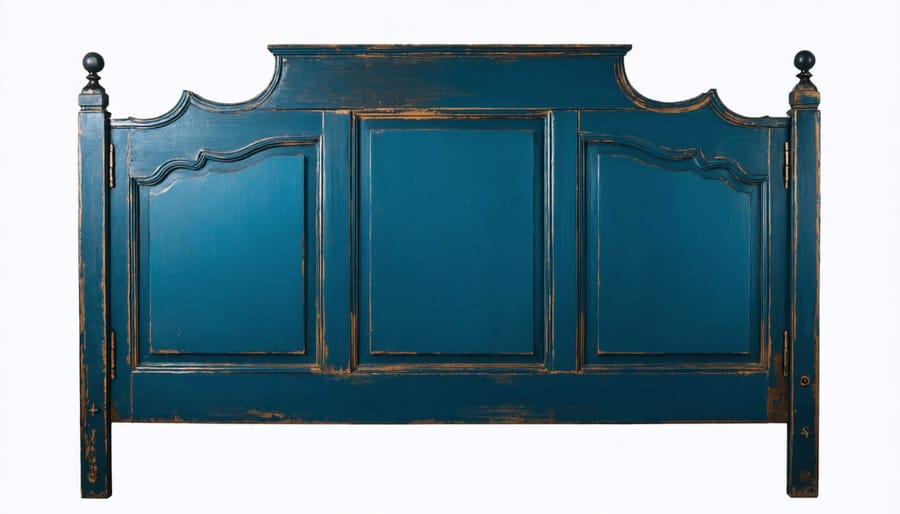
Transform your old furniture into a stunning headboard with these creative upcycling ideas that blend style with sustainability. An old door can become a statement piece with proper sanding, fresh paint, and decorative molding. Simply secure it horizontally to your wall, and you’ll have a unique vintage-inspired headboard that tells a story.
Consider repurposing shutters for a coastal or farmhouse aesthetic. Arrange multiple shutters side by side, paint them in your desired color scheme, and mount them securely above your bed. The natural texture and lines create visual interest while maintaining functionality.
Window frames offer another excellent opportunity for headboard creation. Remove the glass, sand the frame, and either leave it with a distressed finish or paint it to match your décor. You can add fabric panels within the window sections for extra comfort and style. For added character, consider installing small LED lights behind the frame to create a gentle ambient glow.
Old bookcases can be transformed by laying them horizontally and adding cushioning to create a storage-friendly headboard. This practical solution provides both style and function, offering convenient shelving for books, decorative items, or morning essentials.
For a more eclectic approach, arrange several vintage picture frames of different sizes and styles. Paint them in coordinating colors and mount them in an artistic pattern. This creates a gallery-wall effect that serves as both artwork and headboard.
Remember to thoroughly clean and treat any wooden pieces for insects before bringing them indoors. Always ensure proper mounting techniques and use appropriate wall anchors to guarantee safety and stability in your new headboard creation.
Upcycling bedroom furniture offers an exciting opportunity to breathe new life into old pieces while creating a personalized sanctuary that reflects your style. As we’ve explored throughout this guide, transforming existing furniture through upcycling not only saves money but also contributes to environmental sustainability by reducing waste.
Remember that successful upcycling projects start with proper planning and preparation. Whether you’re refinishing a vintage dresser, reimagining an old headboard, or giving new purpose to a worn nightstand, the key lies in selecting the right tools, materials, and techniques for your specific piece.
Don’t be afraid to start small and gradually take on more challenging projects as your confidence grows. The satisfaction of transforming a tired piece of furniture into something beautiful and functional is truly rewarding. Plus, each completed project adds character to your bedroom while building your DIY skills.
We encourage you to look around your home with fresh eyes – that dated bedroom set might just be your next masterpiece waiting to happen. Start collecting inspiration, gather your supplies, and remember that imperfections often add charm to upcycled pieces. With patience, creativity, and the techniques we’ve shared, you’re well-equipped to begin your furniture upcycling journey.
Take that first step today and join the growing community of creative individuals who are revolutionizing their living spaces through thoughtful upcycling. Your perfect bedroom awaits, crafted by your own hands and imagination.