Growing fresh vegetables indoors doesn’t require a sprawling backyard or greenhouse. Transform that empty corner, unused bookshelf, or sunny windowsill into a productive garden that supplies your kitchen year-round while protecting your furniture and floors from water damage.
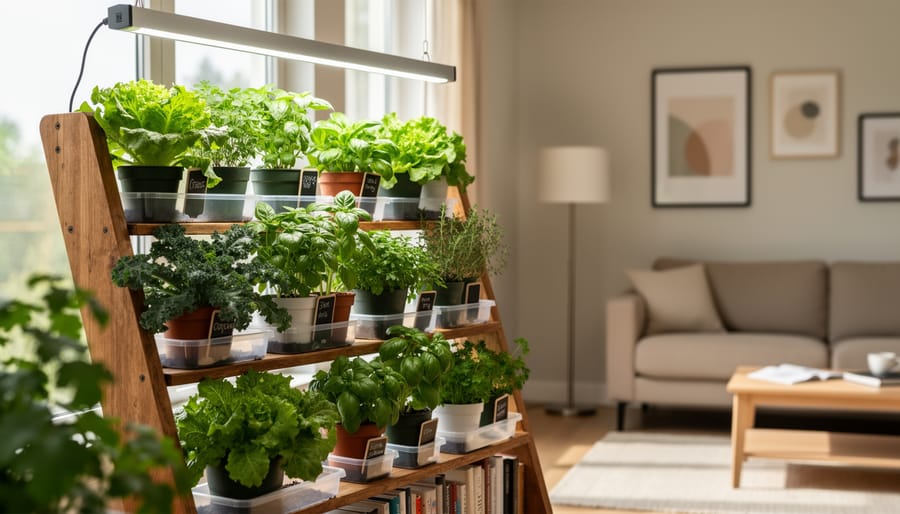
The secret to successful indoor vegetable gardening lies in choosing the right setup for your space and lifestyle. Vertical wall planters maximize growing area in tight quarters, while repurposed furniture pieces like old dressers or bookshelves become unique tiered gardens that double as conversation starters. One homeowner in Portland converted a retired entertainment center into a thriving herb and lettuce garden, complete with integrated grow lights and waterproof trays that kept her hardwood floors pristine.
Space-saving hydroponic systems have become increasingly popular for apartment dwellers in 2026, fitting neatly on countertops while producing impressive yields of greens, cherry tomatoes, and herbs. These self-contained units eliminate soil mess and reduce the risk of water rings on your surfaces, though proper placement on protective mats remains essential for any indoor growing setup.
Your indoor garden should complement your home’s aesthetic, not compromise it. Strategic placement on moisture-resistant surfaces, proper drainage systems, and furniture-safe containers protect your investment in both your vegetables and your interior. When integrated thoughtfully with DIY indoor decor these gardens become functional design elements that bring life and purpose to underutilized spaces.
Whether you’re starting with a simple windowsill herb collection or building a complete grow-light system, the following ideas provide practical blueprints for creating an indoor vegetable garden that works with your space, budget, and skill level.
Start with the sunny spots and furniture you already own. Walk through your home and note where sunlight hits for at least four to six hours daily, south-facing windows are ideal, though grow lights can supplement dimmer areas. Check the temperature zones too; most vegetables prefer 65-75°F, so avoid drafty corners or spots right next to radiators.
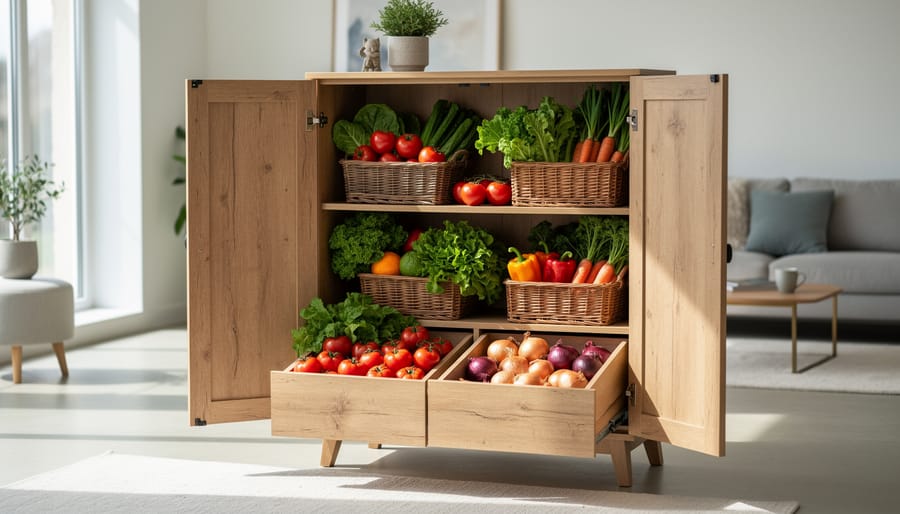
Before buying containers or seeds, measure your available surfaces. A standard windowsill can hold three to five small pots, while a bookshelf or console table can support tiered trays or shallow boxes. Look for underutilized furniture: that empty corner shelf, the top of a filing cabinet, or an old dresser can become a multi-level garden with minimal modification. Just ensure the piece is stable enough to handle added weight from soil and water.
When assessing placement and available space, consider these factors:
Match your garden setup to your room’s existing style. Metal wire shelving suits industrial or modern spaces and allows light to filter through multiple levels. Wooden ladder shelves or repurposed cabinets with removed doors work beautifully in farmhouse or eclectic interiors. For minimalist spaces, opt for clean-lined ceramic planters grouped on a single low bench or floating shelf.
Draw a rough sketch showing which vegetables will go where, factoring in height (lettuce and herbs in front, taller plants behind), light needs, and how often you’ll harvest. This prevents overcrowding and creates visual balance. Remember that you can always start with one windowsill and expand to shelving or furniture pieces as you gain confidence.
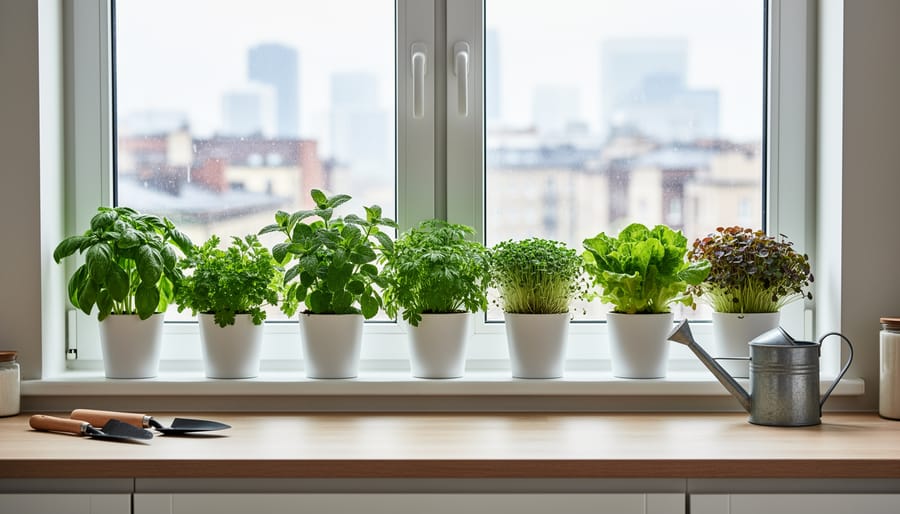
Windowsill gardens transform sunny spots into productive growing zones without requiring floor space or complicated setups. Start by measuring your windowsill depth, most need at least 6 inches to accommodate standard rectangular planters. Choose shallow-rooted vegetables like leaf lettuce, arugula, spinach, and compact herbs such as basil, cilantro, and chives that thrive in containers 4-6 inches deep.
Before placing any planters, protect wooden windowsills from moisture damage. Cut waterproof shelf liner or cork mats to fit underneath each container, extending slightly beyond the planter’s footprint to catch drips. Place saucers or trays under every pot, and check them weekly to empty accumulated water that could warp wood or create stains.
Position containers close to the glass for maximum light exposure, but leave a small gap for air circulation to prevent condensation buildup on frames. South-facing windows provide ideal conditions for fruiting vegetables like cherry tomatoes and small peppers, while east or west-facing sills work well for leafy greens and herbs that tolerate partial sun.
Rotate containers every few days so plants grow evenly rather than leaning toward the light, which keeps your display looking tidy and prevents top-heavy plants from tipping over onto furniture below.
Old dressers with removable drawers make excellent tiered planters for leafy greens and compact vegetables like cherry tomatoes. Pull out the drawers to varying depths, line each with heavy-duty plastic sheeting or waterproof pond liner, and fill with soil to create cascading garden levels. Vintage cabinets work equally well when you remove doors and add shelf liners.
Bookshelf units transform into productive vertical gardens when fitted with grow trays on each shelf. Position taller vegetables like determinate tomatoes on upper shelves and trailing plants like strawberries below for visual interest. When you repurpose furniture this way, stability matters. Anchor tall pieces to walls and distribute weight evenly across shelves.
For detailed upcycling tips specific to different furniture types, consider surface preparation and structural reinforcement before adding soil weight. Remove old varnish where moisture might pool, then reseal those areas. A chest of drawers can support 40-50 pounds per drawer when properly reinforced, enough for substantial vegetable plantings.
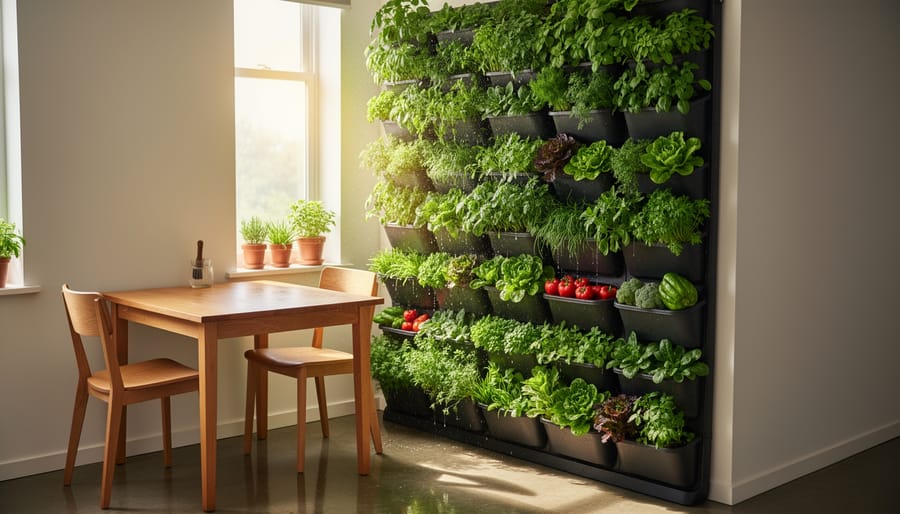
Vertical gardens let you grow vegetables upward instead of outward, turning unused wall space into productive growing areas. A simple DIY plant trellis system mounted to studs can support climbing vegetables like peas, cherry tomatoes, and pole beans while creating an eye-catching green wall in your kitchen or dining area.
Freestanding ladder-style vertical gardens work well if you rent or can’t drill into walls. Stack planters on repurposed wooden ladders or metal shelving units, placing shade-tolerant greens on lower rungs and light-loving peppers or tomatoes higher up. These mobile setups let you rearrange your growing space as needed.
Pocket planters made from breathable fabric hang flat against walls and accommodate shallow-rooted vegetables like lettuce, spinach, and herbs. Mount them on kitchen backsplash areas or near bright windows, placing protective barriers behind them to shield paint and drywall from moisture. Each pocket drains independently, reducing water pooling that could damage surfaces beneath.
Success with indoor vegetables depends on choosing varieties that naturally thrive in controlled environments rather than fighting against plant biology. The vegetables below have proven track records for home growers and adapt well to the space, light, and temperature conditions found in typical residences.
Leafy greens top the list for indoor cultivation. Lettuce, spinach, kale, and arugula germinate quickly and tolerate the lower light levels common near windows or under standard grow lights. These crops reach harvest size in 30-45 days, providing continuous yields if you succession plant every two weeks. Protect roots from rot by using well-draining potting mix and containers with adequate drainage holes. Lettuce varieties like buttercrunch and romaine work especially well on windowsills or in shallow containers placed atop repurposed furniture protected by waterproof trays.
Cherry tomatoes represent the next tier of difficulty but deliver impressive yields for patient growers. Compact determinate varieties like Tiny Tim or Micro Tom reach only 12-18 inches tall, making them suitable for countertop placement or budget-friendly wood shelving units. Expect 60-80 days from seed to first fruit, with plants producing for several months under adequate light. These plants need strong support stakes and benefit from daily misting to improve pollination.
| Vegetable | Light Requirements | Growing Time | Difficulty Level |
|---|---|---|---|
| Lettuce & Greens | 4-6 hours direct or 12 hours LED | 30-45 days | Beginner |
| Cherry Tomatoes | 8-10 hours direct or 14-16 hours LED | 60-80 days | Intermediate |
| Peppers (Small Varieties) | 8-10 hours direct or 14-16 hours LED | 70-90 days | Intermediate |
| Radishes | 6-8 hours direct or 12-14 hours LED | 25-30 days | Beginner |
| Scallions | 4-6 hours direct or 10-12 hours LED | 21 days from sets | Beginner |
Small pepper varieties including shishito and lunchbox peppers produce well indoors with similar requirements to tomatoes. These compact plants stay under 24 inches and fruit prolifically throughout the year when kept warm and properly fed with liquid fertilizer every two weeks.
Radishes and scallions offer nearly instant gratification for beginners. Radishes mature in less than a month, while scallions grown from sets reach usable size in three weeks. Both grow successfully in containers as shallow as four inches and tolerate partial shade, making them perfect for testing your setup before committing to longer-season crops.
Select containers with drainage holes to prevent waterlogged roots and overflow issues. Plastic pots work well for most indoor vegetables and won’t crack like terracotta when bumped. For heavier setups on shelves or cabinets, distribute weight evenly and verify the furniture can support it, a gallon of soil weighs about eight pounds when saturated.
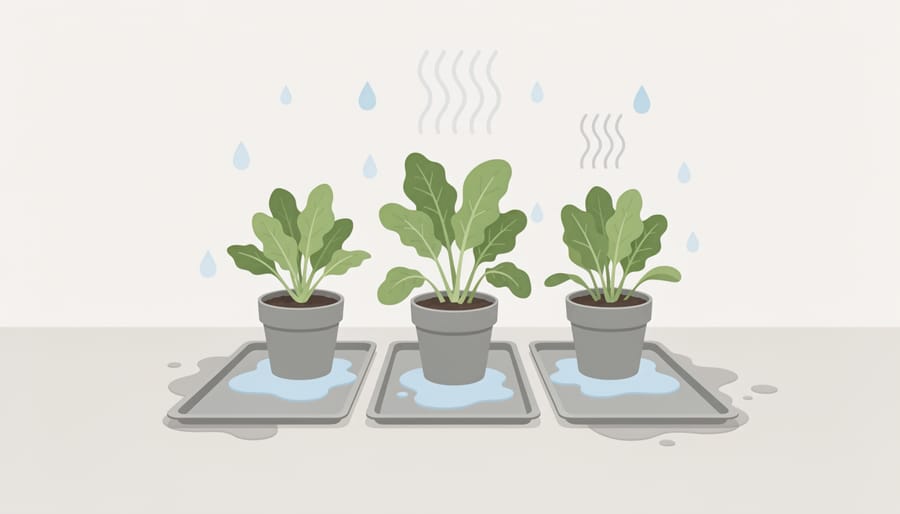
Protect wooden surfaces by placing waterproof saucers under every container. Standard plastic trays work, but they can crack and leak over time. Silicone plant trays flex without breaking and catch overflow reliably. For extra protection on antique or finished wood furniture, add cork pads or felt furniture protectors between the saucer and surface. These absorb minor moisture and prevent scratches when you move containers during maintenance.
Position containers where drips won’t reach upholstered furniture or carpeting. If growing on windowsills with wooden frames, use sill extenders made from water-resistant materials rather than placing pots directly on painted or stained wood. Check saucers weekly and empty standing water immediately, even small amounts can leave rings or cause finish damage on furniture over time. Replace cracked saucers before they fail completely.
Modern grow lights have evolved far beyond the purple-hued industrial fixtures that once dominated indoor gardening. Today’s options deliver the full spectrum your vegetables need while resembling standard home lighting that actually enhances your space.
For indoor vegetable gardens integrated into living areas, slim LED panel lights mounted under shelving or cabinets provide even coverage without visual clutter. These fixtures typically measure less than half an inch thick and come in neutral white tones that look like standard task lighting during evening hours. Position them 12 to 18 inches above leafy greens and herbs for optimal growth without harsh shadows.
Track lighting systems offer exceptional flexibility for multi-level vegetable setups. You can adjust individual fixtures to target specific plants as they grow, and the sleek rails blend seamlessly with contemporary interiors. Look for dimmable models with 3000K to 5000K color temperatures that appear warm and natural rather than clinical.
Pendant-style grow lights work beautifully above kitchen counter gardens or dining table displays. Modern designs feature frosted glass shades or brushed metal housings that mirror popular fixture styles while housing full-spectrum bulbs inside. Hang them 18 to 24 inches above your vegetables, checking manufacturer specifications for exact coverage areas.
Freestanding floor lamps designed for plants now mimic mid-century and minimalist furniture styles. These prove ideal for corner vegetable gardens or standalone displays, requiring no installation while providing adjustable height as your plants mature. Select models with timers to automate light cycles without remembering to switch them manually each day.
Successful indoor vegetable gardens thrive on consistent care routines rather than complicated interventions. Water your containers when the top inch of soil feels dry to the touch, typically every two to three days for most vegetables, though herbs like rosemary prefer slightly drier conditions. Check each plant individually rather than watering on a fixed schedule, since light levels, container size, and vegetable type all affect moisture needs. Use room-temperature water and pour slowly until it drains from the bottom, then discard excess water from saucers within fifteen minutes.
Feed your vegetables with diluted liquid fertilizer every two weeks during active growth periods. Most indoor vegetables perform well with balanced 10-10-10 formulas at half the recommended strength, though leafy greens like lettuce and spinach benefit from slightly higher nitrogen ratios. Organic options like fish emulsion work effectively but smell strong, so apply them near open windows or just before leaving the house.
Indoor pests appear less frequently than outdoor problems, but aphids, fungus gnats, and spider mites occasionally arrive on new plants or through open windows. Inspect leaves weekly, checking undersides for tiny insects or webbing. Yellow sticky traps catch fungus gnats before populations explode, while a strong spray of water dislodges aphids from lettuce and herbs. Neem oil spray handles persistent infestations without introducing harsh chemicals near your food.
Rotate containers a quarter turn every few days so all sides receive equal light exposure, preventing lopsided growth. Prune yellowing leaves promptly and pinch back herbs to encourage bushier growth. Wipe dust from leaves monthly with a damp cloth, which improves photosynthesis and keeps your vegetables looking fresh. These simple maintenance habits take fifteen minutes weekly but dramatically improve harvest quality and keep your growing area tidy.
Water rings, soil spills, and mineral deposits from drip trays rank among the most common furniture casualties in homes with indoor vegetable gardens. Prevention starts with proper barriers between your plants and vulnerable surfaces.
Always place waterproof trays or saucers underneath every container, but don’t stop there. Add felt pads or cork coasters between the tray and your furniture to prevent trapped moisture from seeping into wood grain. For larger setups on dressers or cabinets, cut a sheet of clear acrylic or vinyl to size as a protective layer that’s invisible yet effective. Replace fabric placemats with wipeable silicone mats that catch drips and soil without staining.
Check the undersides of your drip trays weekly. Even small amounts of standing water can damage wood finishes over time. If you spot a fresh water ring, act immediately: blot the area dry, then gently buff with a soft cloth and a small amount of mineral oil or furniture polish. For older rings that have penetrated the finish, a paste of equal parts baking soda and non-gel toothpaste can sometimes lift the stain when rubbed gently with the wood grain.
Soil splatter during watering is preventable. Water slowly with a narrow-spouted can, keeping containers in a sink or bathtub until they’ve fully drained. For wall-mounted systems above furniture, install a clear splash guard or position a towel during watering sessions.
If water damage has already compromised your furniture’s finish, yellowed from prolonged moisture exposure, or developed deep staining that home remedies won’t fix, professional restoration can often reverse the damage. Furniture repair specialists assess whether refinishing, veneer replacement, or other treatments will restore your pieces without replacement costs.
Starting your DIY indoor vegetable garden in 2026 doesn’t require a massive commitment or dedicated growing space. Even a single windowsill herb garden or repurposed cabinet planter can deliver fresh greens within weeks while adding living beauty to your home. The key is beginning with one or two easy-growing vegetables, mastering the basics of light and watering, then expanding as your confidence grows.
Remember that protecting your furniture and wooden surfaces is just as important as nurturing your plants. Simple precautions like waterproof trays, coasters, and regular moisture checks prevent the costly water damage and staining that often catch new indoor gardeners by surprise. When you plan thoughtfully from the start, your vegetable garden enhances your interior design rather than compromising it.
Whether you’re growing microgreens on your kitchen counter or building a multi-tier vertical system, indoor vegetable gardening puts fresh, pesticide-free produce within arm’s reach year-round. Start small, protect your surfaces, and enjoy watching both your skills and your harvest expand over time.