
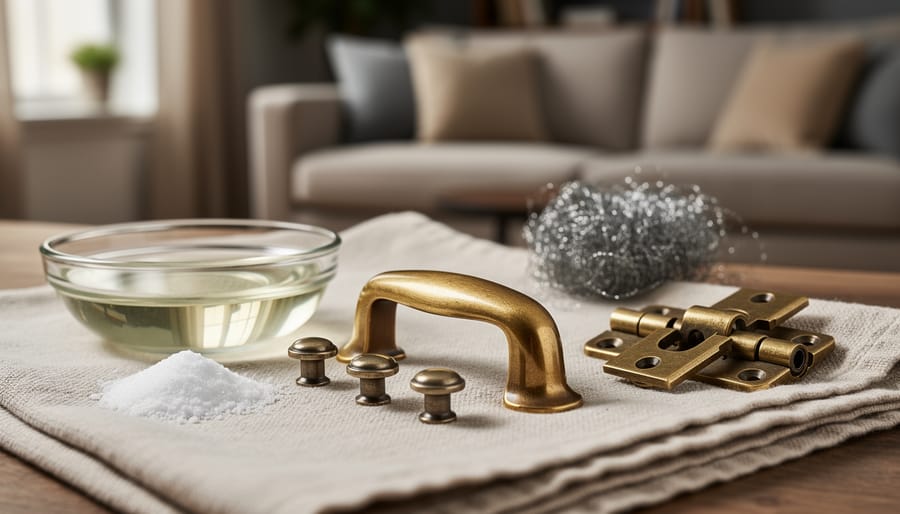
Restoring tarnished brass pulls, oxidized hinges, and worn metal knobs on your living room furniture takes about two to four hours per piece and requires only basic supplies: white vinegar, baking soda, fine steel wool, and metal polish. The process transforms dated hardware through careful cleaning, light abrasion, and protective finishing, bringing back the original luster without the cost of replacement. Thousands of homeowners are now sharing this satisfying transformation through live streaming tutorials, making furniture restoration one of the fastest-growing DIY categories online in 2026.
The appeal is simple. Hardware restoration delivers dramatic visual impact with minimal investment, and the before-and-after results speak for themselves. One customer told us their vintage credenza went from “garage sale reject to showpiece” after spending just $12 on supplies and an afternoon on the hardware alone. That kind of transformation captures attention whether you’re watching a tutorial or creating one.
Live streaming adds a powerful dimension to learning restoration techniques. Real-time interaction lets viewers ask questions about tricky spots, unclear steps, or product alternatives as the work unfolds. For those teaching, it builds credibility and community around your restoration skills. Whether you’re looking to refine your technique through pro-level training or share your own methods with an audience, understanding the complete restoration workflow matters.
This guide walks you through the full hardware restoration process, from safely removing fragile components to verifying durability after refinishing, with specific attention to the details that make live tutorial content valuable and watchable.
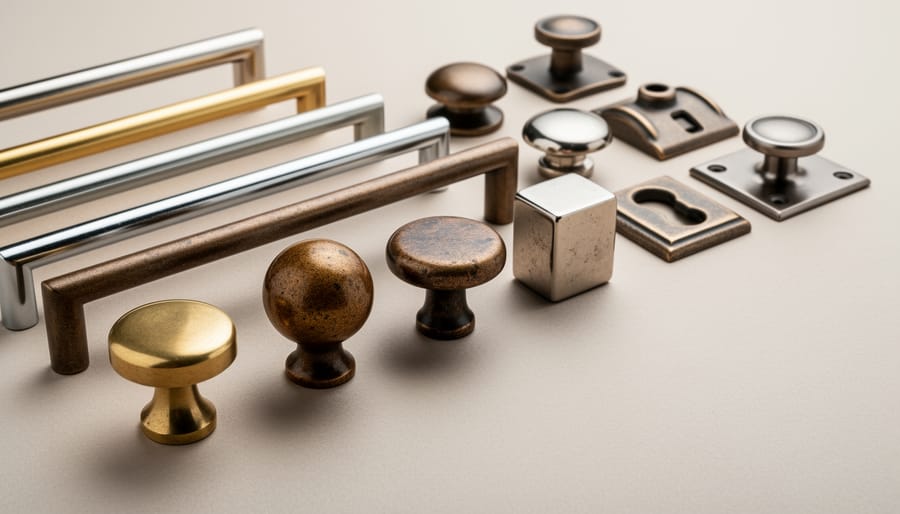
Living room furniture hardware encompasses all the metal components that make your pieces functional and beautiful. Drawer pulls allow you to open storage compartments, cabinet knobs provide grip on doors, hinges enable movement, decorative handles add style, escutcheons protect wood around keyholes, and casters let furniture roll. These pieces weren’t mass-produced afterthoughts. Craftsmen selected hardware to complement the furniture’s design, often using brass, bronze, iron, or steel with hand-applied finishes that developed character over decades.
Original hardware tells your furniture’s story. A patinated brass pull from a 1920s credenza carries the fingerprints of generations. Those wear patterns, the slight asymmetry of hand-finished pieces, and period-specific designs make furniture authentic. When you replace original hardware with modern reproductions, you strip away that history and often reduce the piece’s value, particularly with antiques and quality vintage furniture.
Identifying hardware worth saving takes just a few minutes. Examine each piece for maker’s marks, hand-finishing details, or unusual designs that suggest original installation. Surface issues like tarnish, old lacquer, light corrosion, and grime are all fixable. Bent pieces can often be straightened, and stripped screw holes can be repaired. What you can’t easily fix are snapped posts, completely rusted-through metal, or deep cracks in cast pieces.
Hardware that’s clearly a modern replacement, poorly matched to the furniture’s style, or made from cheap pot metal doesn’t merit restoration effort. You’re better off sourcing appropriate period hardware or quality reproductions. But that original set of ornate Victorian pulls or those Mission-style copper handles? They’re worth every minute you’ll invest bringing them back to life.
Before diving into hardware restoration, gathering the right supplies saves frustration and ensures professional-looking results. Most projects require a mix of household items and specialty materials you’ll find at hardware stores or online restoration suppliers.
Removal and Documentation Tools
Start with basic hand tools you likely own: screwdrivers (both flathead and Phillips in various sizes), needle-nose pliers, and adjustable wrenches. A camera or smartphone captures hardware placement before removal. Small labeled bags or an ice cube tray keeps screws organized with their corresponding pieces. For stubborn fasteners, penetrating oil like WD-40 loosens corrosion without damaging surrounding wood.
Cleaning and Assessment Materials
Stripping and Refinishing Supplies
Chemical paint stripper handles thick paint layers, though citrus-based or soy-based strippers work well in enclosed spaces. Metal polishes matched to your hardware type (brass, bronze, steel) remove tarnish. You’ll need fine-grit sandpaper (400-600 grit), tack cloth for dust removal, and clear lacquer or paste wax for protective finishes. Cotton swabs and soft cloths apply polish in crevices.
Repair Essentials
For bent pieces, a small bench vise holds hardware safely while you straighten it. Epoxy putty fills stripped screw holes or small voids. Files and rotary tools with polishing attachments smooth rough edges after repairs.
Most basic supplies come from hardware stores, while specialized metal polishes and conservation-grade lacquers are available through woodworking suppliers and online restoration retailers like Mohawk Finishing Products or Van Dyke’s Restorers.
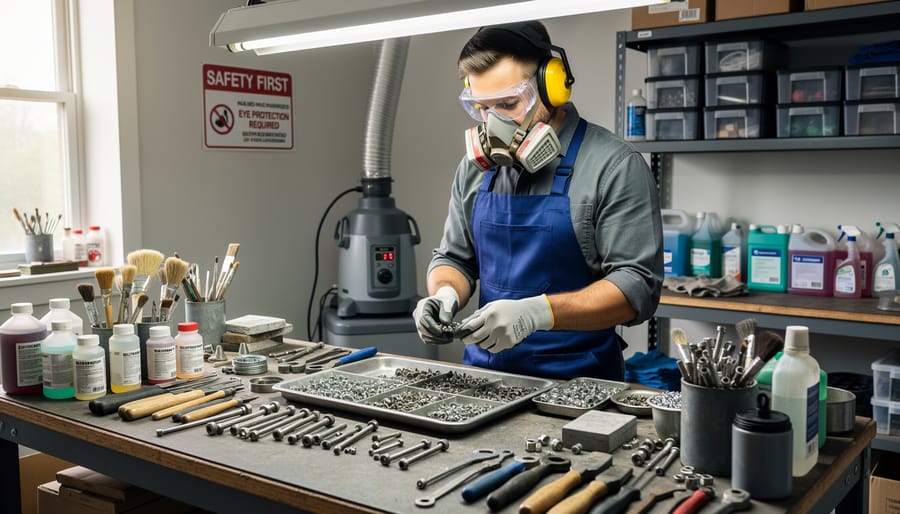
Restoring hardware at home requires careful attention to safety, particularly when working with chemical strippers and metal cleaners. Many restoration products contain caustic or toxic ingredients that can cause skin burns, respiratory irritation, or worse if handled improperly. Set up your workspace in a well-ventilated area, preferably outdoors or in a garage with both doors open and a fan creating cross-ventilation. If you plan to live stream your restoration work, position cameras and lighting before you begin, so you won’t need to adjust equipment with chemical-covered gloves later.
Essential protective gear includes chemical-resistant nitrile gloves (not latex, which many chemicals penetrate), safety glasses or a face shield to protect against splashes, and a respirator mask with organic vapor cartridges when using strippers or lacquers. Standard dust masks provide no protection against chemical fumes. For work involving sanding or grinding metal, you’ll need particulate filters meeting OSHA respirator requirements. Cover your work surface with plastic sheeting or heavy cardboard, and keep a bucket of water nearby for immediate dilution of spills.
Safe chemical disposal is crucial. Never pour strippers, acids, or finishing products down household drains. Store used chemicals in their original containers or clearly labeled jars, and take them to your local hazardous waste collection facility. Keep a first aid kit within reach, and if you’re demonstrating techniques on camera, explain safety steps aloud, your viewers learning to repair at home need to understand precautions as much as techniques.
Before any cleaning or restoration begins, proper removal and documentation prevents future headaches. Start by photographing each piece of hardware in place from multiple angles, these photos become your roadmap during reinstallation. Use your phone’s camera and take close-ups showing exactly how handles, knobs, or hinges sit on the furniture.
Label everything immediately. Write numbers on masking tape strips and attach them to corresponding hardware pieces and their screws. Drop each set into a separate small plastic bag or container, keeping fasteners with their hardware. This simple system saves hours of confusion later when reinstalling.
For frozen or corroded fasteners, resist forcing them. Apply penetrating oil and let it sit overnight. Gently tap stuck screws with a screwdriver handle to break corrosion’s grip. Use a properly-sized screwdriver that fills the screw slot completely, mismatched tools strip heads and create bigger problems.
Work slowly around delicate veneers or inlays. Place a thin cloth between your screwdriver and furniture surfaces to prevent accidental slips from gouging wood. If a screw refuses to budge after proper penetrating oil treatment, stop. Damaged screw heads often require professional extraction to avoid furniture damage.
Once you’ve safely removed all hardware pieces, resist the urge to jump straight into aggressive cleaning. Start with gentle removal of surface accumulation using warm water, mild dish soap, and a soft-bristled toothbrush. This reveals what’s actually underneath without risking damage to original finishes you might want to preserve.
Pay attention to what comes off and what remains. Old furniture wax feels waxy when rubbed and often has a yellowish tint. Years of handling leave oils that attract dust, creating dark buildup in recesses. Remove these layers patiently, work in small circular motions, rinse frequently, and dry thoroughly with cotton cloths.
Now assess what you’re working with. Brass typically shows golden-yellow color where cleaned and may have green corrosion (verdigris). Bronze appears more copper-toned with possible green-blue patina. Steel attracts a magnet; brass and bronze won’t. Iron shows reddish-brown rust rather than green corrosion.
Check existing finishes by examining protected areas like screw backs. Original lacquer appears as a clear coating, sometimes yellowed or cracked. Plating creates an unnaturally uniform surface layer. Natural patina develops unevenly with darker areas in recesses. Identifying your metal type and existing finish now determines every subsequent restoration choice.
The method you choose for removing old finishes depends entirely on what you’re dealing with and what you want to preserve. For painted hardware, a quality paint stripper works fastest, apply it according to the manufacturer’s directions, let it work for the specified time, then scrub with a brass brush. Work outdoors or in your well-ventilated workspace, as the fumes can be intense even with low-odor formulas.
Tarnished brass or bronze responds beautifully to gentler treatment. Start with a mild metal polish like Brasso or Wright’s Copper Cream, rubbing in small circular motions with a soft cloth. This preserves any desirable aged patina in recessed areas while bringing raised surfaces to a shine. If you’re working with pieces that have historical value, stop before you remove all the patina, that aged character is part of the charm and often increases value.
For stubborn lacquer, acetone or lacquer thinner cuts through quickly, but test a small spot first. Some vintage finishes are shellac-based and dissolve easily with denatured alcohol applied on fine steel wool. Heavily corroded iron or steel may need naval jelly or rust remover, followed by thorough rinsing and immediate drying to prevent flash rust.
Always work conservatively. You can always remove more finish, but you cannot put original patina back once it’s gone.
Bent drawer pulls and broken decorative elements are common issues you’ll encounter during restoration. For mildly bent brass or bronze hardware, use padded pliers or a small vise with soft jaw covers to carefully straighten pieces. Work slowly with gentle pressure, checking frequently to avoid overcorrecting or creating stress fractures in the metal.
Broken hardware presents more complex challenges. Small cracks in solid brass pieces can often be brazed using a propane torch and brass brazing rod. Clean the break thoroughly, flux both surfaces, and apply heat until the brazing rod flows into the joint. This creates a permanent bond nearly as strong as the original metal. For iron or steel hardware, welding may be necessary.
Stripped screw holes in hardware backing plates can be repaired by filling with epoxy putty, letting it cure completely, then carefully re-drilling pilot holes. Missing finials, decorative elements, or small parts sometimes require fabrication. You can cast replacements using moldable silicone and metal epoxy, though this demands practice. For valuable antiques with significant damage or missing ornate components, professional restoration ensures authenticity and preserves value rather than attempting complex repairs yourself.
With your hardware cleaned and repaired, refinishing restores protection and appearance. Your approach depends on the metal type and desired aesthetic.
For a polished brass or bronze look, start with fine metal polish and a soft cloth, working in small circular motions until you achieve the desired shine. Follow with a thin coat of clear lacquer to prevent tarnish, applying it in a dust-free area using light, even strokes. Let lacquer dry for 24 hours before handling.
To create an antiqued patina on brass or bronze, apply a chemical patina solution following manufacturer instructions. These solutions work quickly, so monitor closely and rinse with water when you reach the desired darkness. Seal with paste wax rather than lacquer to maintain the antiqued character.
For iron or steel hardware, apply a rust-preventive primer if any bare metal is exposed, then finish with black enamel paint or a rust-converting coating. Two thin coats always beat one heavy application.
Plating work requires professional equipment and isn’t suitable for DIY streaming. If your hardware needs chrome, nickel, or electroplating restoration, this is where professional services become essential.
Handle freshly finished pieces by the edges only. Allow full cure times (48-72 hours for most finishes) before reinstalling, even if the surface feels dry to the touch.
Before you thread that first screw back into place, take ten minutes to verify your work. Rushing reinstallation after hours of careful restoration is how you turn a success into a frustration.
Start by inspecting each piece under good light. Look for streaks in your finish, missed corrosion spots, or areas where polish pooled in crevices. Run your finger along edges, any sharp burrs or rough spots will snag on fabric or scratch furniture. If you applied lacquer or wax, check that it’s fully cured by pressing your thumbnail gently into an inconspicuous area; it shouldn’t leave a mark.
Test every moving part. Drawer pulls should slide smoothly through their mounting posts. Hinges must swing freely without binding or squeaking. If a piece sticks or feels tight, don’t force it during testing or you’ll undo your refinishing work. A bit of graphite lubricant on moving joints solves most friction issues without attracting dust like oil does.
When you’re satisfied with function and appearance, dry-fit everything. Hold hardware against the furniture without screwing it down. Does it sit flush? Are the holes aligned? This catches problems before you risk scratching your fresh finish with a slipped screwdriver.
For reinstallation, work slowly with the right tools. Use a hand screwdriver rather than a drill for final tightening, power tools strip vintage screw holes easily. Tighten just until snug; overtightening brass screws can twist the heads right off. Place a soft cloth under your work area to protect both the furniture’s surface and your refinished hardware from accidental contact.
Setting up a quality live stream of your hardware restoration work doesn’t require professional studio equipment, but a few thoughtful choices make the difference between viewers who stick around and those who click away after thirty seconds. Position your camera overhead or at a slight angle to capture both the hardware and your hands as you work, viewers want to see the actual technique, not just your face talking about it. Ring lights or adjustable LED panels eliminate shadows on small metal pieces, which is crucial when you’re demonstrating the difference between tarnished and polished brass or showing subtle patina variations.
Narrate what you’re doing as you work, but don’t feel pressured to fill every silence. Explaining why you’re choosing one polish over another or how you’re judging when to stop sanding adds real value that separates tutorials from simple time-lapses. If you’re documenting a particularly valuable piece or complex repair that might benefit from professional expertise, mention that some projects warrant calling in specialists who offer on-site repair services. Your viewers appreciate the honesty, and it builds trust while keeping their furniture safe from well-intentioned but risky amateur attempts.
While DIY hardware restoration is rewarding for many projects, some situations demand professional expertise. If your living room furniture is a documented antique, particularly pieces with provenance or maker’s marks, professional restorers have the knowledge to preserve value and historical integrity that amateur attempts might compromise. Complex metalwork like intricate Victorian backplates, delicate Art Nouveau motifs, or multi-component assemblies requires specialized tools and experience to disassemble, restore, and reassemble without causing irreversible damage.
Specialized finishes present another threshold for professional intervention. Period-correct plating techniques, chrome, nickel, bronze, or gold, require industrial equipment, chemical baths, and environmental controls that home workshops simply can’t accommodate safely or effectively. Similarly, structural repairs involving brazing, welding, or metal fabrication on load-bearing hardware demand metallurgical knowledge to ensure safety and longevity. Professional restorers often work alongside wood repair services to address both hardware and furniture damage comprehensively, ensuring hardware reinstallation won’t stress weakened wood or stripped screw holes. When evaluating whether professional restoration justifies the investment, consider the furniture’s replacement cost, sentimental value, and how original hardware affects its character, sometimes paying a specialist preserves something truly irreplaceable.
A properly applied finish typically lasts 10-15 years with normal use, though high-touch pieces like frequently used drawer pulls may need touch-ups sooner. Lacquered or waxed finishes require periodic maintenance, while quality plating can last decades if the hardware isn’t subjected to moisture or harsh cleaning chemicals.
Matching is possible but challenging since manufacturers, styles, and finishes change over time. Your best approach is bringing a sample piece to specialty hardware suppliers or searching architectural salvage yards for period-appropriate matches. Restoring what you have is often easier than finding exact replacements.
Use a magnet as your first test: it will stick to steel or iron but not brass, bronze, or copper alloys. Brass has a yellow-gold color when cleaned, bronze appears more reddish-brown, and steel is silver-gray. The weight also helps, as brass and bronze feel noticeably heavier than steel pieces of similar size.
A typical living room piece with 6-10 hardware items requires 8-12 hours spread over several days to allow for drying time between steps. Complex repairs or intricate pieces take longer, while simple cleaning and polishing might only need 2-3 hours total.
If you’re documenting your restoration process through live streaming or planning a series of tutorials, organizing content with smart UX design helps viewers find specific techniques quickly. Many restorers timestamp their videos for each major step, making it easier for viewers to jump to the removal phase, cleaning methods, or refinishing application without watching the entire stream.
The most common troubleshooting issue involves stripped screw holes in the furniture itself rather than damaged hardware. Fill stripped holes with wood glue and toothpicks, let dry completely, then redrill pilot holes for the screws. Another frequent problem is removing frozen screws without breaking the hardware: apply penetrating oil, wait 30 minutes, then use a manual screwdriver rather than a power tool for better control and feel.
Restoring original hardware on your living room furniture delivers both tangible and emotional rewards. You’ve preserved a piece’s authenticity, saved money compared to replacement, and gained hands-on skills that transfer to future projects. The transformation from tarnished, damaged metal to gleaming, functional hardware creates a sense of accomplishment that’s hard to match.
Start small if you’re new to restoration. A single drawer pull or cabinet knob makes an excellent first project, building your confidence before tackling entire sets or complex pieces. Live streaming tutorials have democratized restoration knowledge that was once confined to professional workshops, letting you learn techniques in real-time and see exactly how experts handle challenges.
For valuable antiques, intricate metalwork, or projects requiring specialized equipment like electroplating, professional restoration services ensure museum-quality results without risk to irreplaceable pieces. Vital Turnaround offers expert furniture restoration for complex hardware projects where precision and experience matter most.
The before-and-after transformations you’ll achieve continue to inspire new projects. Each restored piece of hardware contributes to your living room’s character while honoring the craftsmanship of furniture makers who designed these details to last generations.